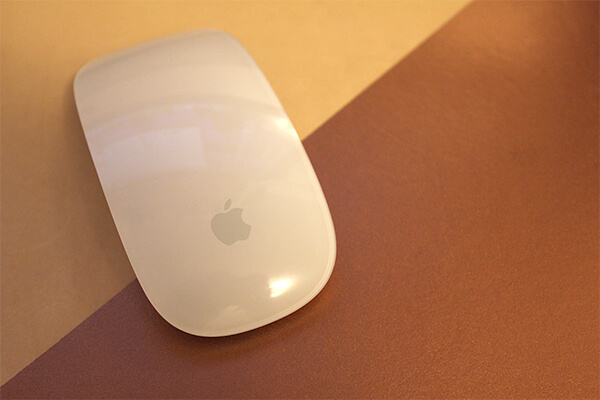
A while ago, I saw a leather mousepad on a blog I follow and fell in love with it. It was kind of pricey, though, and I didn’t want to invest because I manage to destroy them pretty fast with pencil smudge, ink pens, etc. So if you’re in the market for a new mousepad, here’s how to create your own.
SUPPLIES:
leather scrap large enough to make a mousepad with. I bought a piece of 8.5″ X 11″ tooling leather from a craft store for about $6. It’s thick and durable, perfect for this project.
metallic spray paint. I used Rust-oleum copper spray paint I had left over from another project. You could use a pretty, bright color rather than a metallic if you want.
masking/painter’s tape.
exacto/utility knife.
cutting mat or scrap cardboard
metal ruler (one with a cork grip is best for safety)
recommended: leather protector and/or clear gloss sealer (see step 4)
INSTRUCTIONS:
1. Decide what size you want your mousepad to be. I made mine 8.5″ by 9.5″. Measure how much you want to cut off and line up your ruler where you need to cut the leather. On a protected surface (I used a cutting mat, but scrap cardboard would work too), use the ruler as a guide to cut a straight line with your exacto knife. Be very careful – don’t cut yourself. I just used enough pressure to score the top layer of the leather. That creates a groove that will guide your knife so you don’t have to use the ruler anymore. I went back over several more times with the knife until I had cut all the way through. Just be patient and careful so the cut will be clean and so you don’t hurt yourself. I had to go over it about 5 times to cut all the way through the leather, but it really depends on the thickness of the piece you use.
2. Use masking tape to mark off the area(s) of the leather you don’t want to paint. I only put one strip of tape on the leather because I didn’t want the tape to mess it up. I taped down scrap paper to cover the rest of the area I didn’t want to paint. For mine, I sectioned it of diagonally to make a colorblock design like the mousepad I fell in love with, but you could really do anything – stripes or chevron would be cute (just be sure to test the tape on your leather first to make sure it doesn’t hurt it).
3. Take it outside and follow the directions on the spray paint bottle to evenly coat the leather. Let it dry (most spray paints take 24 hours). I took the tape and paper off the leather as soon as it was dry to the touch (about an hour) so the leather wouldn’t have to be susceptible to the glue of the tape for longer than necessary.
4. Now you have a pretty mousepad! After about a week of use, mine started to collect dirt, particularly on the unpainted half. I would highly recommend that before painting the leather, you apply some sort of leather protector. I say before because many leather protectors are oils, and your paint may be oil-soluble. You would need to apply it to the leather and let it dry BEFORE painting it. Since obviously it’s too late for me to do this, I decided to paint the unpainted half of my mousepad (I used masking tape again to protect the metallic half). I used acrylic paint in a chartreuse yellow color (I used a brush, but spray paint would work, too). I actually really like the pop of color. If you decide to do this, you have to apply several coats of paint to get an even color because leather is porous. I’m also planning on spraying a coat of clear gloss onto my mousepad to add an extra layer of protection (I’m using Crafts Etc. clear acrylic gloss sealer – I already had it from another project). This will also hopefully give it a smoother surface that will be less likely to collect dirt. This might be a good idea even if you choose not to paint the entire mousepad. I would test the gloss on a scrap of leather first, though.
I’ll share the results of my gloss application as soon as I finish.
Have an awesome Monday and be sure to stop by tomorrow – I’m doing my first ever giveaway!


