DIY Doctor Who (or just cool outer space) Tote

I made this tote as a Christmas gift for a cousin who likes Doctor Who, but I really like how it turned out and wish I had one for myself! Even without the TARDIS, it would still be a really cool outer space image. Or you could even put something random floating around in space instead of the TARDIS…like a cow, perhaps (haha). Here’s what I did. I made it all up as I went along, so I’m happy it worked out so well.

SUPPLIES:

canvas tote bag (find at a craft store)

acrylic paints in blues, purples, black, and white

paint brush(es)

cardboard the size of the bag (to slip inside it while working)

(optional) TARDIS or other stamp

STEPS:

1. Wet the area of the tote bag that you plan to paint. I just used a paint brush to dab the water on. Slip a piece of cardboard in the bag so the paint won’t seep through onto the other side of the tote.
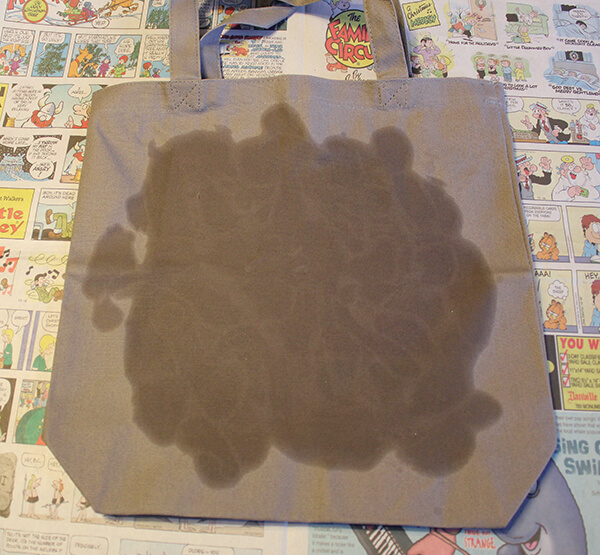
drwho1

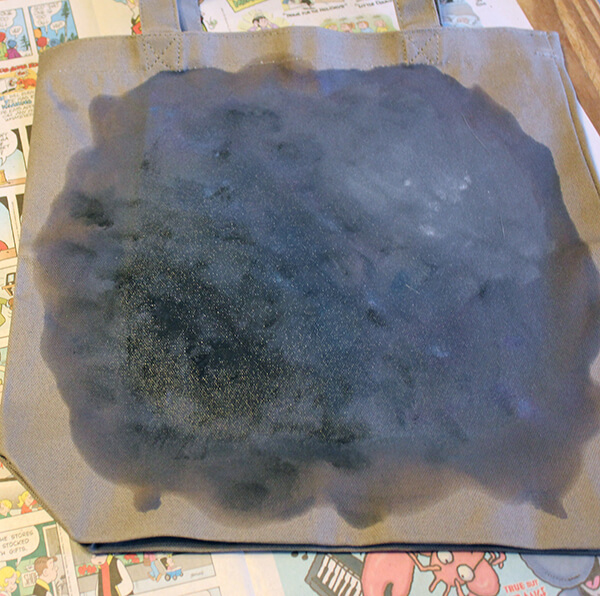
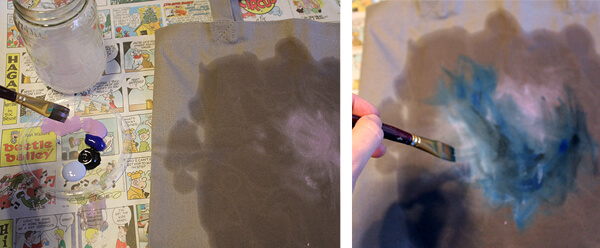
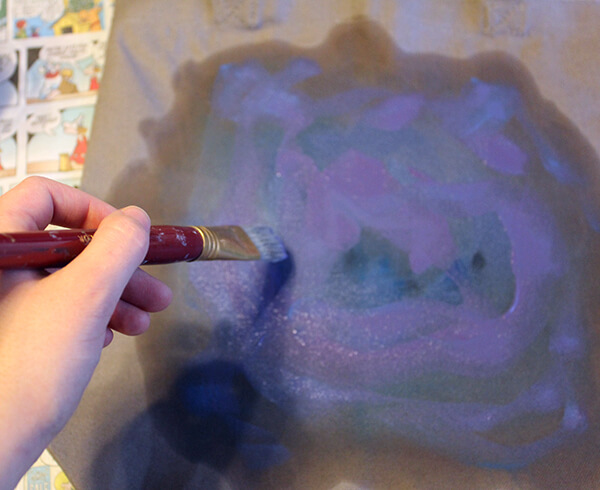
2. Get a cup of water and prepare your different paint colors. I used a dark and light blue, a dark and light purple, and black. using a wet paintbrush, dab paint all over the bag (the wet area). Using a different paintbrush, dab water all over the paint you apply. The water thins out the paint so you can spread it around and give it that cloudy, galaxy-like look. Just keep applying paint and water (I used a lot of water) until you like how it looks. Keep in mind it will be lighter when it dries – all that water is making the fabric look a lot darker than it is.
drwho2

drwho3

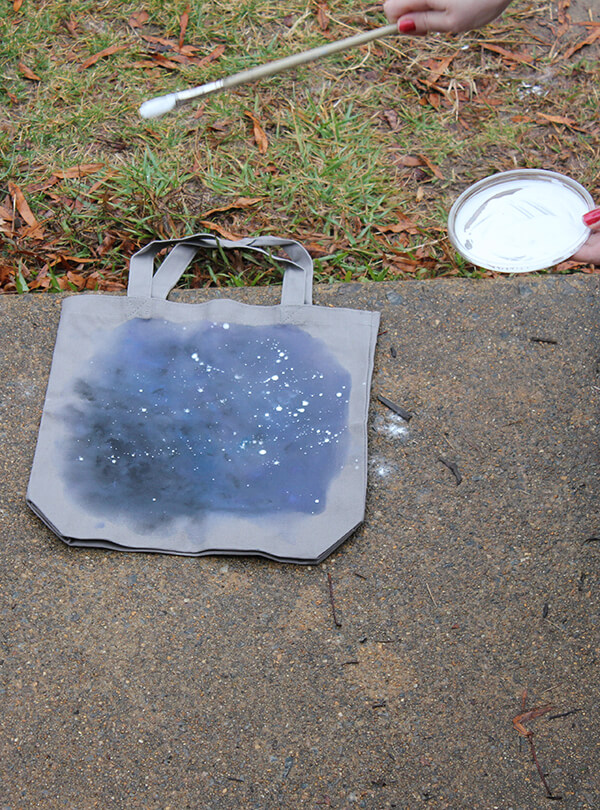
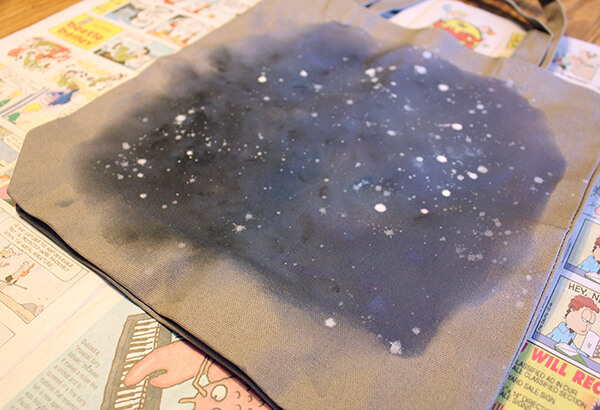
drwho43. When the tote is dry, take it outside (this step is messy). Water down some white paint and do some splattering. Just dip a paintbrush in the white paints and flick it over the tote. Do this until you have a lovely, star-filled galaxy.
drwho5

drwho6

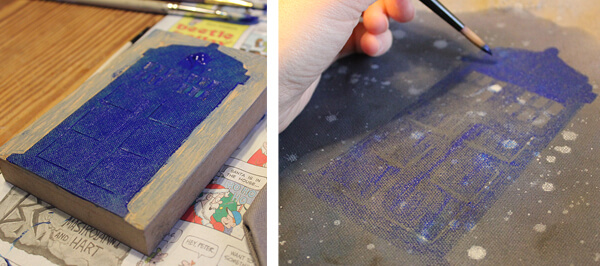
4. This step is optional…you can just leave the awesome space image as is if you like it that way or don’t care about Doctor Who (gasp!). I had this TARDIS carving I did for a letterpress class, so I used that. You can probably freestyle the simple TARDIS shape if you trust your painting skills. Another option would be to get a linoleum block and carving supplies and make your own stamp (really not worth the effort…if you can carve, you could probably just freestyle the picture directly onto the bag a lot more easily). Put paint on the stamp and press it onto the bag. This just left a light coating of paint when I did it, but it provided a nice guide…I just went back over it freestyle to make the image darker and more clear.
drwho7-1

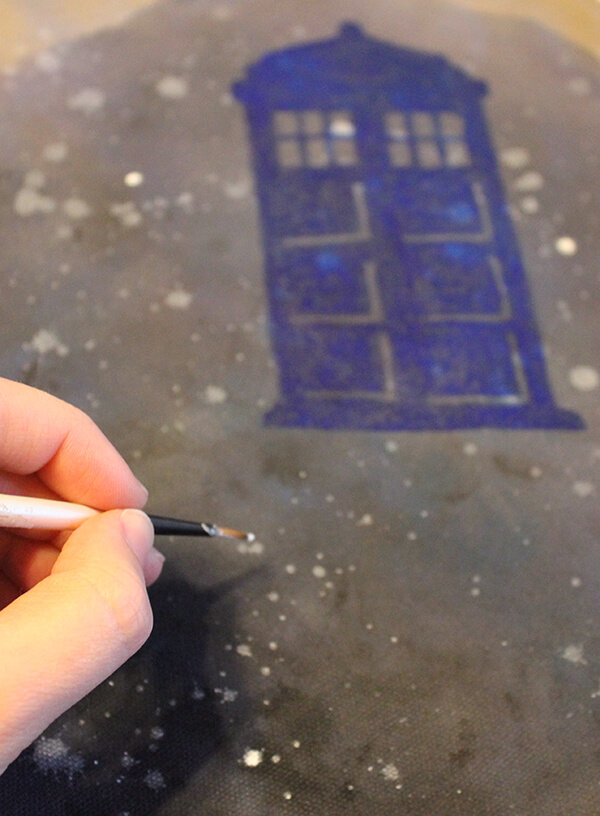
5. This step is also optional. Since I watered down the white paint for the stars, once it dried it was pretty faint. I went back over some of the stars with white paint (NOT watered down) to brighten them up. This also gives more dimension to the image – the brighter stars appear closer.
drwho7

6. Enjoy your new tote (or give it as a gift like I’m doing)!
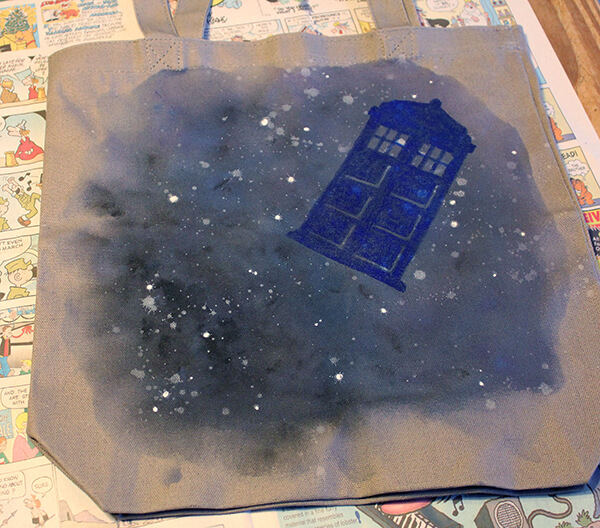
drwho8If you have any questions, please ask in the comments! I’ll be happy to answer!

Posted in DIY | Tagged , , , , , , , , , | 2 Responses

Pop of Purple

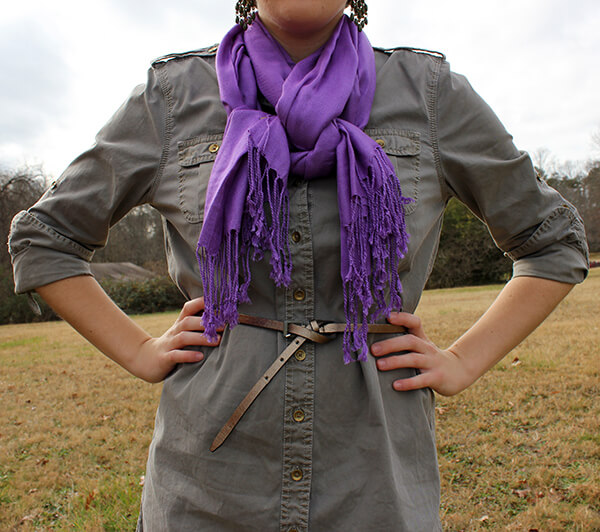
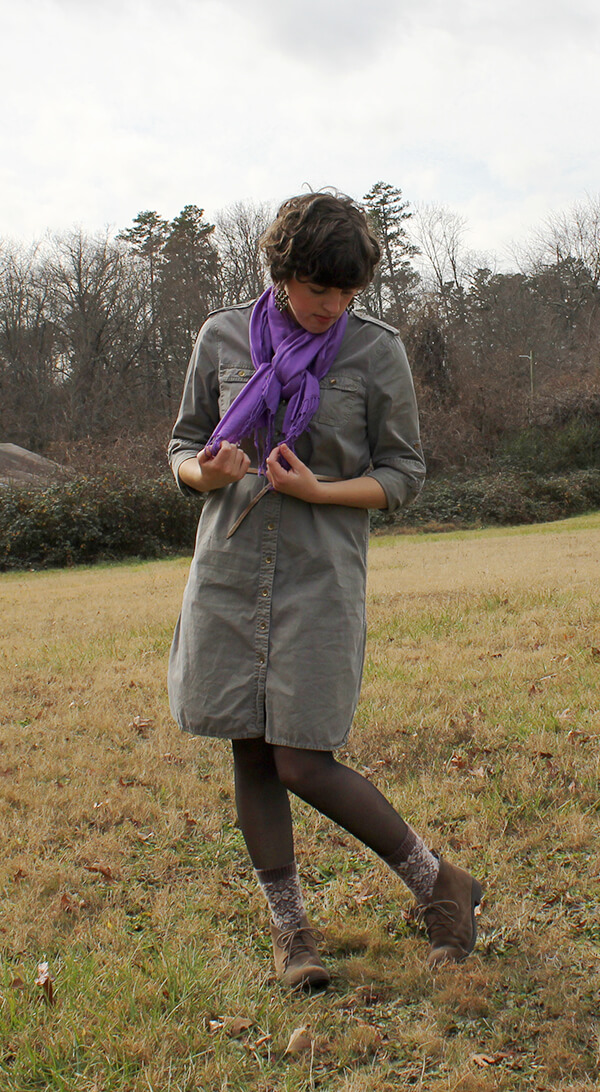
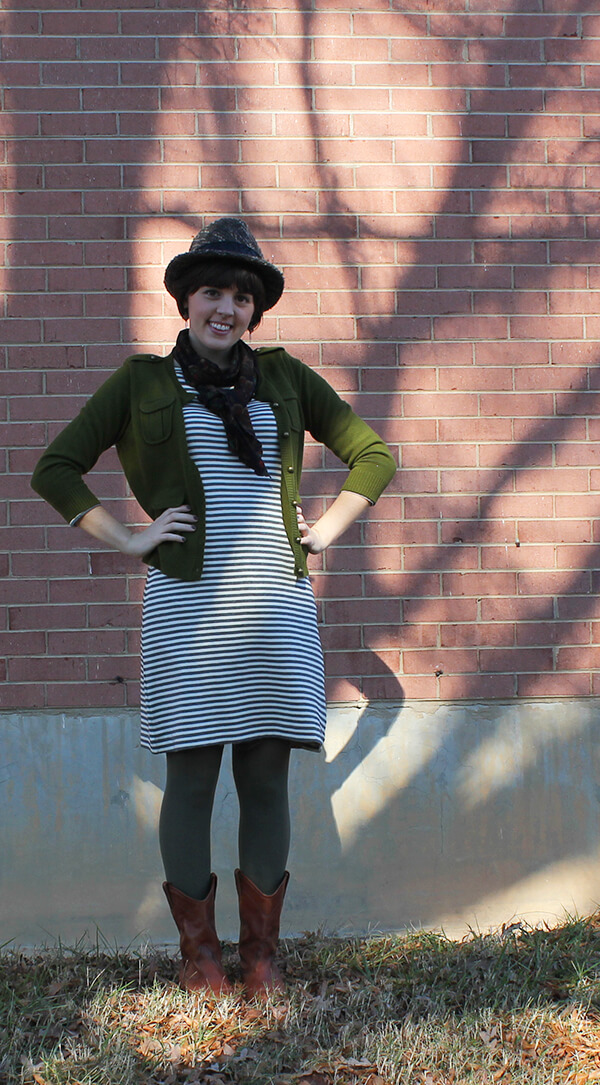
Last Tuesday, I returned to my beloved college to attend an event where all the Digital Video and Cinema (DVC) students debut their 20 minute films they spend the semester working on. I wasn’t a DVC student, but I did start out as one before switching to a different concentration. I have lots of friends and acquaintances who are DVC, so the event is something I’ve enjoyed going to for the past several years. I wouldn’t have dreamed of missing it this semester, as there were a couple films I was really looking forward to seeing (one I designed a logo for). They were all really fantastic, and it was a ton of fun getting to see so many friends (several close friends who graduated when I did went to the event as well). Anyway, this is what I wore. …Have I told you how much I miss school?!

I Hope you had a great Monday! I’m off on an adventure to visit some family through Wednesday. (I’m scheduling a post, so you won’t miss me.)

P.S. See this post on Sidewalk Ready to learn how I tied my scarf (though mine didn’t quite turn out like hers). I did it a while after watching the video so I probably didn’t do it right. Oh well.
olivepur1 olivepur6 olivepur2 olivepur3 olivepur5 olivepur4

dress: secondhand Gap
socks: Sierra Trading Post
shoes: secondhand Miss Sixty
scarf: secondhand
belt: secondhand
earrings: secondhand

Posted in STYLE | Tagged , , , , , , , , , , , , , , , | 2 Responses

Weekend Links!

image via

I’m so excited to see the Hobbit! In the meantime, this is ridiculous.

How to create the ultimate layered outfit, via Free People.

Check out these beautiful macro photographs of snowflakes!

20 absolutely delicious sounding holiday recipes from A Beautiful Mess.

Fixing…the most common, humble and beautiful form of creativity.”

Some fun tree ornament DIY ideas.

Check out my secondhand gift guide if you haven’t already!

Have a great weekend! Any exciting plans? I have so many friends finishing up their semesters at college that I ALSO kinda feel like my “break” is starting…even though I’m not in school and don’t have one. Siiiigh. I miss school.


Posted in FUN | Tagged , , , , , , , , , , , | 3 Responses

Secondhand (Not Second-Rate) Gift Guide

secondhand_gifts

I’ve always been the homemade gift type of person. Whether just a simple card or a larger undertaking like a painting or jewelry, I just think they’re more heartfelt…at least for me. But some people just aren’t crafty or simply don’t have time. For those people, there are still ways to give amazing, heartfelt gifts without spending a fortune. Your first thought may be, “secondhand gifts…I don’t want to be a cheapskate and give a tacky, pre-owned gift.” But trust me, it’s completely possible to give secondhand gifts that aren’t second-rate. I’ve been receiving secondhand gifts for most of my life, and I’ve always enjoyed and appreciated them. Here are a few ideas and tips so you can master the art of secondhand gift-giving. (Note: This post is written specifically with ladies in mind, but you can probably modify ideas or come up with ideas of your own based on this list if you are shopping for a gentleman or a kiddo.)

  1. Create a jewelry gift bag . Go to your local consignment/thrift store and I’m SURE you’ll find oodles of cute fashion jewelry and even some nice “real” pieces. Since they’ll probably have great prices, pick a few. Find a cute clutch, small purse, or cosmetic bag to put the jewelry in. Spending $20 on a few necklaces AND a clutch beats spending $20 on a single necklace at a department store!
  2. A scarf, purse, or other accessory . Consignment stores (at least the ones I’ve been to) ALWAYS have really cute, often new or even designer accessories…at amazing prices, of course.
  3. Gift basket . Grab a basket from a thrift store or the dollar store (or just use a gift bag) and fill it with all kinds of goodies from a consignment or thrift store. DVDs, picture frames, candles, jewelry, scarves, books…just go shopping with a specific person in mind and I’m sure you’ll find some stuff they’ll love. And with DVD’s likely not being more than $5 a piece, you can really fill that basket or bag!
  4. Look for items new with tags . If you’re concerned the recipient will be wary of the origin of untagged/unboxed items, you can usually find quite a few new items in consignment stores that are truly steals. Just hunt those down.
  5. A giftcard . Ask your favorite store if they offer gift cards. Obviously with this gift you need to be certain of the recipient’s stance on secondhand shopping.
  6. Have a little more time and a best girl friend who you love to go shopping with? Give your friend a shopping trip ! Offer to chauffeur her to your (or her) favorite consignment or thrift store, give her some cash, and have fun! Maybe even take her to lunch before or after. I did this with my best friend recently, and she had a great time (I didn’t pay for her purchase, but I did pay for the gas…the store was an hour away. And my sister payed for her dinner).
  7. DIY . I always use secondhand clothes to create my DIY items. A personalized gift is always awesome. See this and this for a couple ideas.
  8. Go explore …this is kind of the same point I made in idea #3. There’s probably an unexpected gem waiting at your local consignment or thrift store, so go look around. Who knows, maybe you’ll find something really unique that would be absolutely perfect for that person you have in mind.


Now go shopping! Not sure where to go?

  • Local? Here’s a coupon for Your Stuff & Kids’ Stuff Consignment Boutiques .
  • Try Buffalo Exchange if you’re lucky enough to live near one. There are a lot of them in the southwest US, but they’re scattered all over the country.They’re very trendy, and even have some vintage finds. LOVE! (Unfortunately the closest one to me is still three hours away.)
  • Plato’s Closet locations are all over the US. Their target audience is younger…preteens/teens, but they can vary a lot depending on where they are. For example, there’s one in Charlottesville near UVa, and they normally have quite a bit of super nice J. Crew stuff there. But there’s another I’ve been to in North Carolina that is huge and has packed racks, and honestly it’s a bit overwhelming…too much teenybopper stuff to dig through to be worth the time.
  • Uptown Cheapskate locations aren’t as plentiful as Plato’s Closet…just check the map. They also cater to a younger audience, but more so to young adults than Plato’s so I actually like them quite a lot.
  • Often, the best places to go are little local boutiques. Here is a handy shopping guide by NARTS (Association of Resale Professionals). You can use it to search for consignment and thrift stores in your area that are NARTS members (which are always top-notch stores). I’ve been to a lot of these stores (in Scottsdale/ Phoenix, Palm Beach, St. Louis, Dallas) and they will be COMPLETELY worth your time if you’re near any and can visit.
  • (note: all stores are linked to locations page)

I hope this is helpful to you and HAPPY SHOPPING! :)

Posted in SHOPPING, STYLE | Tagged , , , , , , , , , , , , | 7 Responses

Holiday Dinner

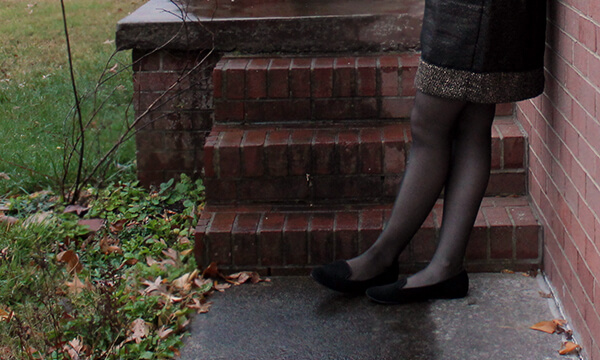
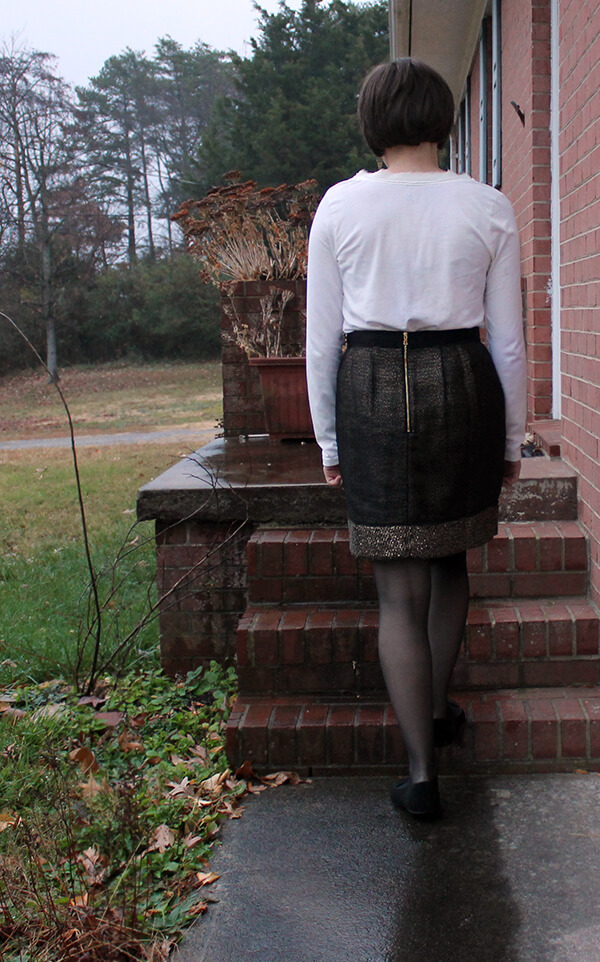
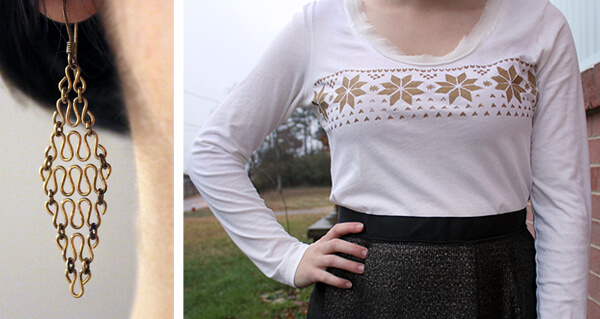
Your Stuff and Kids’ Stuff‘s Christmas dinner was on Friday. In an attempt to be a little festive, I wore the Nordic inspired tee I made last week (tutorial here) with a sparkly skirt. Nearly everyone else was wearing jeans. Woohoo for always overdressing!

I took these pictures at dusk…in the rain…in a hurry. Not bad considering all the factors working against me! :D
holiday1 holiday6 holiday4 holiday3 holiday2 holiday5

tee: secondhand Loft DIYed
skirt: secondhand Loft
tights: CVS, maybe?
loafers: Crown Vintage via DSW
coat: secondhand Gap
earrings: secondhand

Posted in STYLE | Tagged , , , , , , , , , , , , , , , | 4 Responses

Weekend Links!

photo via modern hepburn

I did a DIY peter Pan collar not too long ago, but here’s a more glitzy one.

I used to always request a calendar for Christmas. I still think they make great gifts. Here are some cute ones on Etsy. 1, 2, 3, 4, and 5.

Or how about a calendar you can print our for free and decorate to your liking?

Society 6 now has throw pillows. Endless options! Designlovefest.com pointed out these lovely ones by Garima Dhawan.

DIY reindeer garland

Mmmmm…

Anthropologie is having an amazing giveaway. Check out this catalog. You want everything in it, right? Well some really lucky person is going to win it all. Chances of winning? Slim. But one can dream.

Sidewalk Ready posted a video tutorial for a cool way to tie a scarf .

Lastly, have you ever seen more adorable platypuses?

Have a lovely weekend!

Posted in FUN | Tagged , , , , , , , , , , , , , , , , | 1 Response

DIY Nordic Sweater Inspired Tee

title
There are tutorials all over the internet for DIY screen printing with this method or a similar one, so this is really nothing original or innovative. I did really like the idea of doing a pattern, though, and I also did a few steps a little differently than other tutorials I’ve seen. So here’s a step-by-step of what I did and also a link to the pattern I used. Enjoy!

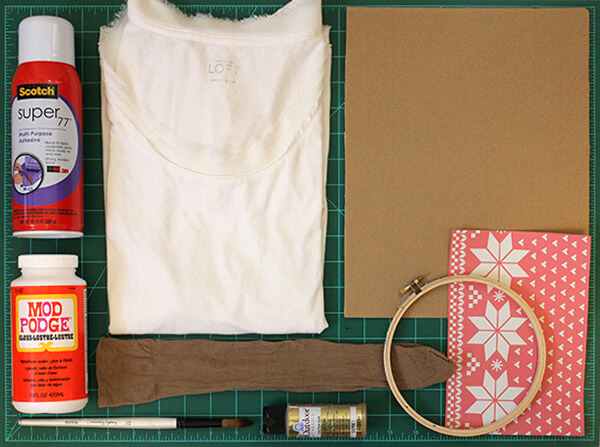
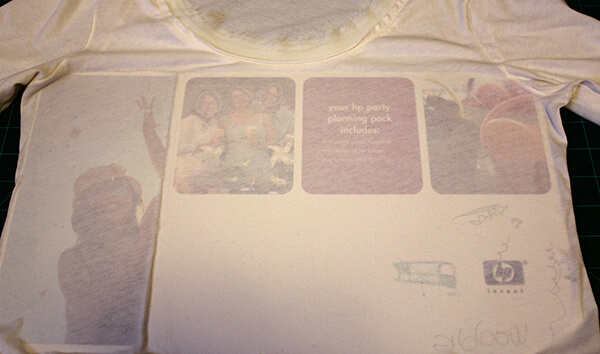
nordicshirt1 Supplies:

t-shirt, any color will work. I used ivory, but a bright color or even black would be fun, too.

cardboard , the width of the t-shirt or as close to that width as you can find.

a pattern to transfer to the shirt. I used a Nordic sweater pattern that you can download for free here. I wanted to make a shirt that was kind of Christmas-y, but not something I could ONLY wear at Christmas time. A Nordic sweater-inspired print is perfect.

embroidery hoop

old tights/pantyhose or a similar fabric.

thin tip sharpie or similar pen/marker. I personally used a micron pen.

Mod Podge, whether it’s glossy or matte doesn’t matter.

paintbrush(es), I used a small one for applying Mod Podge so I could get thin lines and little details. A bigger brush is better for the paint application. A paint or makeup sponge would work well for the paint application, too.

paint, I used gold, but as I said for the shirt, a color would be really cool, too.

spray adhesive, optional, but very helpful.

Instructions:

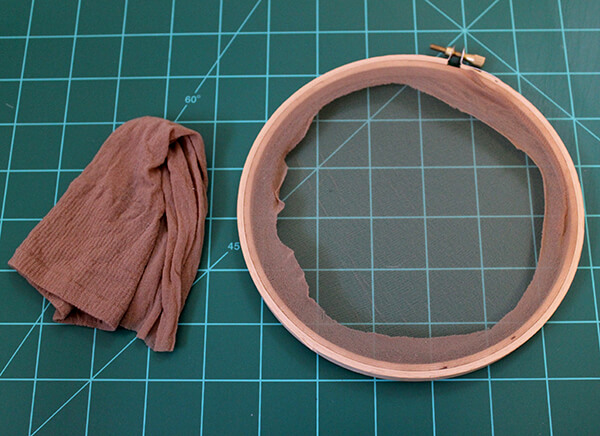
1. Wrap the pantyhose around the inner embroidery hoop. Make sure the fabric is taut, but be careful not to snag it. Slip on the outer hoop and tighten it. cut off the extra hose so it looks like the image below.

nordicshirt2

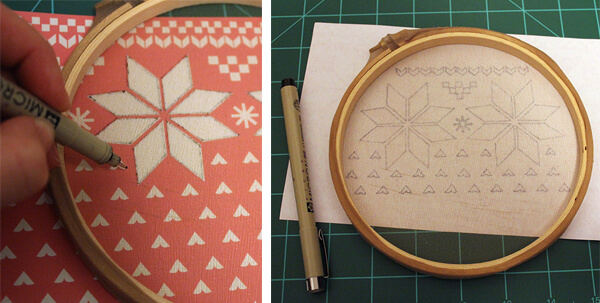
2. Lay your pattern under the hoop and position it where you want to draw it onto the fabric. Hold the hoop in place and carefully trace the image.

nordicshirt3

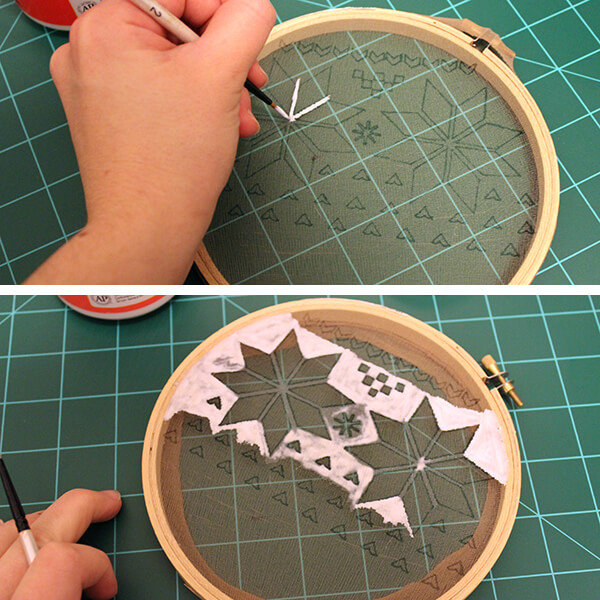
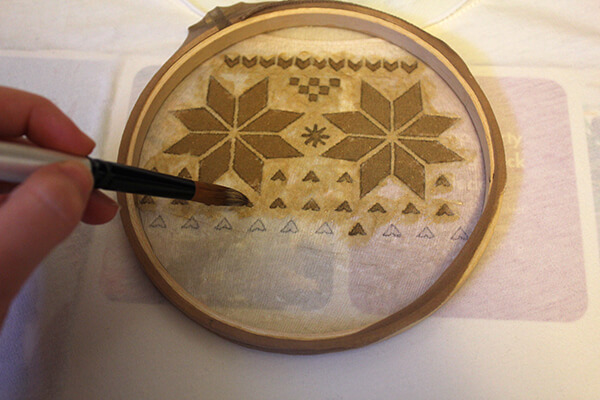
3. Carefully apply Mod Podge to the negative space. So put Mod Podge everywhere where you DO NOT want paint to seep through. With this particular pattern, a thin paintbrush comes in handy since there are lots of tiny spaces and thin lines. Let the Mod Podge dry completely.

nordicshirt4

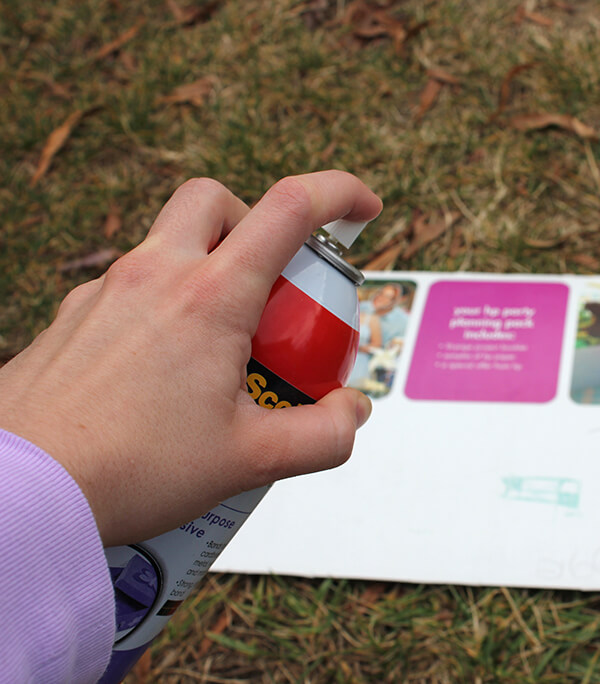
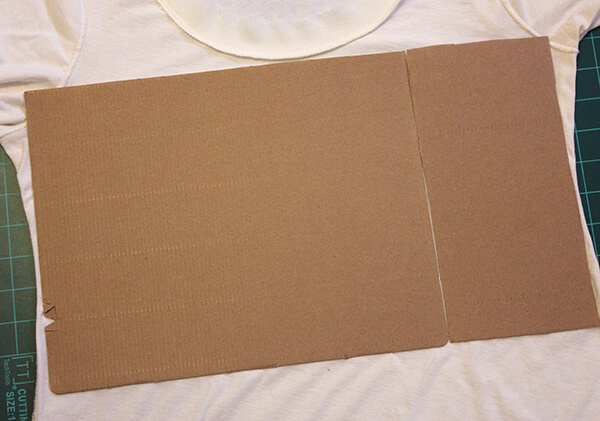
4. Take your cardboard to a well ventilated area and apply spray adhesive to one side (my cardboard had a slick side, so I applied the adhesive to that side because I figured it would be easier to peel the shirt off of it). Turn your t-shirt inside-out and spread it flat, front facing up. Press the sticky side of the cardboard onto your shirt where you’d like the pattern to be (front top). Give the glue a few minutes to dry, then carefully turn the shirt right-side out. The shirt probably will peel off of the cardboard some while you are doing this, but that’s fine. Just adjust it and smooth it back out once you finish turning it right-side out. Now you have a nice smooth surface to transfer your pattern to. If you want, you can skip the spray adhesive and just lay the cardboard inside the shirt, but the spray adhesive keeps the shirt from bunching up or shifting while you work.

nordicshirt5 nordicshirt6 nordicshirt7

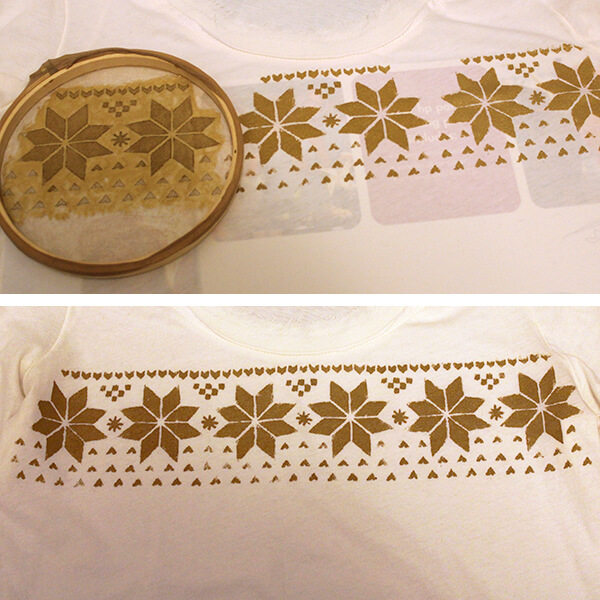
5. Line up the embroidery hoop where you’d like the pattern to be on the shirt. If you are using the pattern I used, start in the middle. (I tested my pattern on a scrap of paper first just to make sure it worked well.) Dab paint all over the pattern until you’ve covered it all. Carefully pull the hoop off the shirt. Let this first transfer dry. I rinsed off my paintbrush and hoop in between applications, but be VERY careful if you rinse off your hoop. Mod Podge isn’t completely water resistant, so it may make some of the Mod Podge sticky or wash off. You probably don’t really need to rinse the paint off it, anyway. Once the first application dries, line up the pattern beside it and paint again. Do this until the pattern goes the full width of the shirt. This took three applications for me – the first in the middle, then one to the left and one to the right. I also had to go in an fill in a few gaps (see images below).

nordicshirt8 nordicshirt9

6. Peel the shirt off of the cardboard and you’re done!

Posted in DIY | Tagged , , , , , , , , , , , , | 2 Responses

Jumping Fun

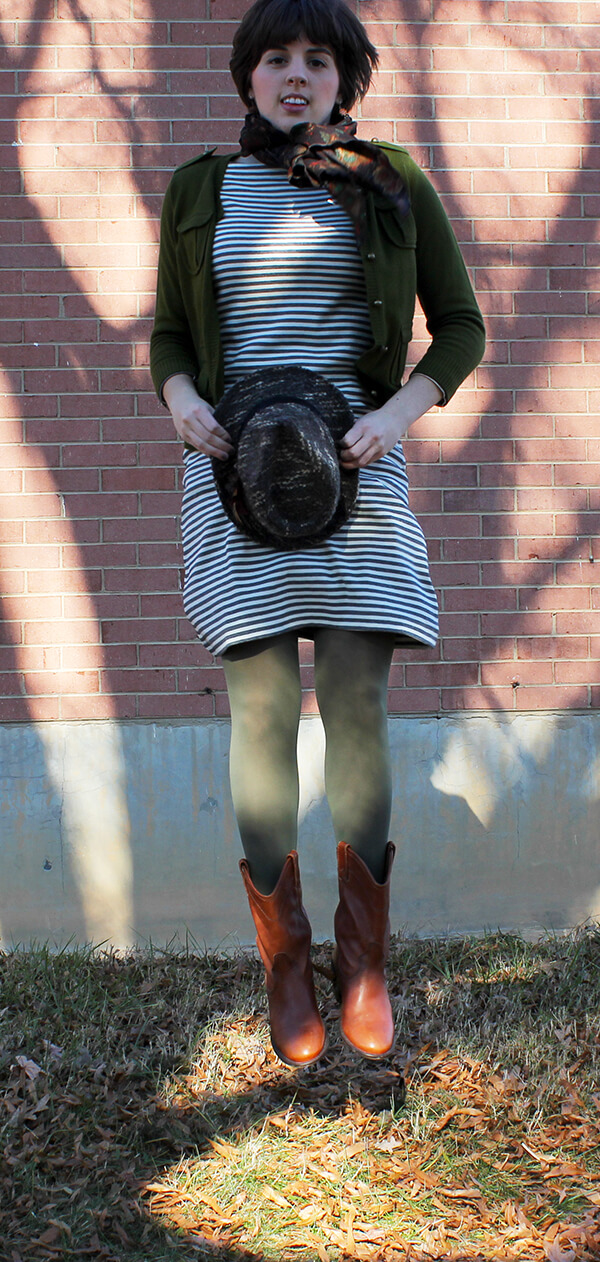
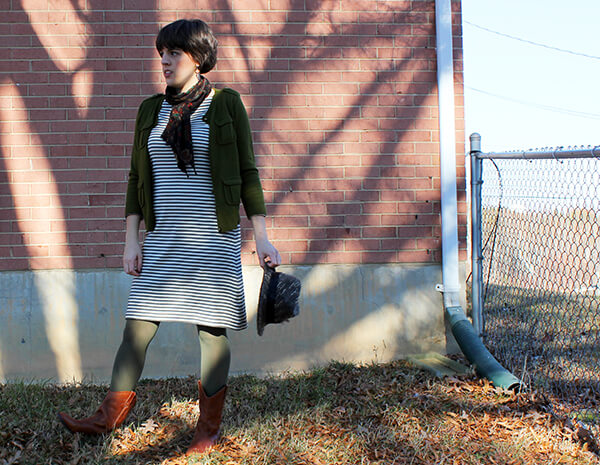
I need to remember in the future that I have a dog and my backyard is her potty. To put it nicely, I spent a while cleaning my shoes after these pictures. Ew.

I wore this to take my friend shopping at a consignment store about an hour away. It was the perfect outfit, really, because I was wearing enough layers to make me not want to try too much on, so I only bought a sweater and a purse (I just went to the same store a couple weeks ago and spent a lot).

I have a tutorial coming later this week…a nice festive one. I’ve been working on some freelance graphic design and web design projects with approaching deadlines, so I have yet to actually DO the project that my tutorial is for, but hopefully I’ll start tonight and finish tomorrow. So expect it (or hope for it) on Wednesday.

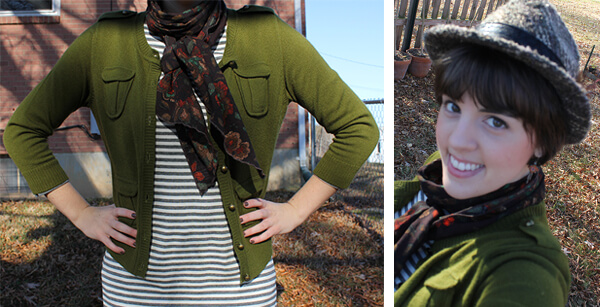
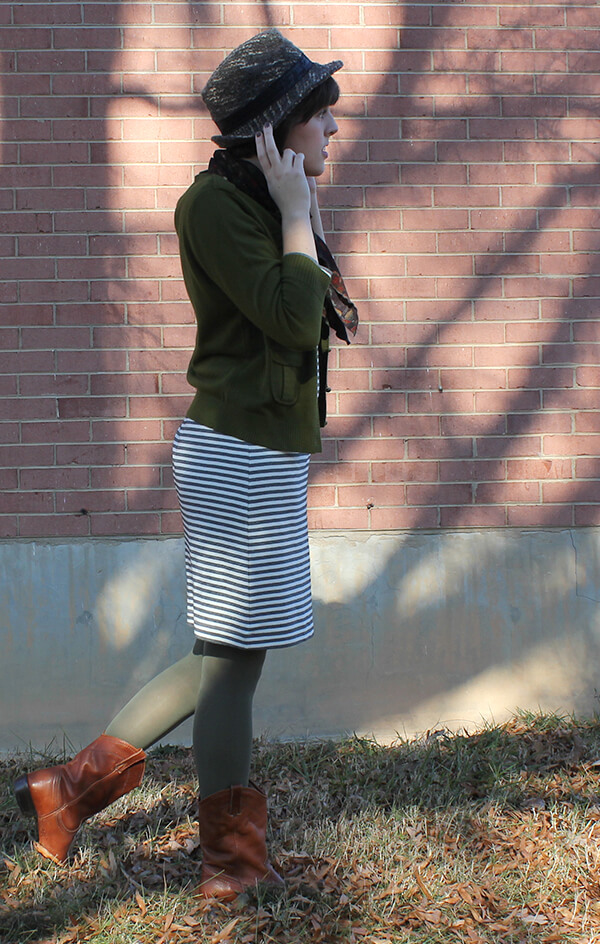
Speaking of festive, it’s really hard to grasp that it could possibly be December where I am. The weather today was in the 70s – unseasonably warm! WHAT? Where’s my snow? How’s the weather where you are?OLIVESTRIPE4 OLIVESTRIPE3 OLIVESTRIPE5 OLIVESTRIPE6 OLIVESTRIPE2 OLIVESTRIPE1

dress: secondhand Tory Burch (new with tags, orig. $200. I got it for less than $100. Oh the perks of consignment stores!)
sweater: secondhand New York and Company
scarf: secondhand
tights: Target
boots: secondhand Steve Madden
hat: secondhand San Diego Hat Co.

Posted in STYLE | Tagged , , , , , , , , , , , , , , , , | 3 Responses

Weekend Links!

image via modernhepburn

image via modernhepburn

Interesting product, but I just like the video.

Recipes illustrated by artists from around the world. They’re so pretty…I just want to print them all out!

Make an adorable Christmas tree out of pipe cleaners.

A handy-dandy no-buy gift guide.

On the opposite end of the spectrum, Madewell’s gift guide. I want it all (guilty)!

DIY felt garland – pretty!

This looks really yummy!

Stylish chickens.

I want a tulle skirt.

Have a lovely weekend!

Posted in FUN | Tagged , , , , , , , , , , , , , , , | Leave a comment

Thanksgiving Outfit

I wore this on Sunday to go celebrate a second Thanksgiving with some family. I have a dozen different shades of brown and grey going on here as well as many different patterns and textures, but I really like how it turned out.

Oh hey, I never wished you all a happy Thanksgiving! How was it? Hopefully filled with lots of yummy food and family time! :D

Silliness always happens when my sister is home.

sweater: secondhand A.N.A.
cardigan: secondhand Loft
skirt: secondhand xhilaration
belt: secondhand
tights: CVS??
boots: secondhand Mossimo

Posted in STYLE | Tagged , , , , , , , , , , , , , , | 6 Responses

  • Hey! I'm Maggie, a graphic designer, crafter, devoted secondhand shopper, Doctor Who fanatic, and dog-lover. Stick around and explore!


  • Enter your email address to receive notifications of new posts by email.